Saturday, March 31, 2012

Lido 14 Mast Step Reconstruction

With the forward bulkhead completed, I am now reconstructing the Deck Mast Step. So I removed the beam that spans the deck. Then I removed the brackets on the sides of the beam that were fixed to the hull. I have reconstructed the beam and reset it under the deck.


Now I have to construct the side supports that are fixed to the hull.

Monday, March 26, 2012

Lido 14 progression

I wrote to John of Double Wave to ask about restoring the Lido 14. I did not want to do anything that would disqualify it from a future owner racing it. He wrote back right away and told me that it was not in good enough condition to worry about being raced and also noticed that the Keel Trunk had an extra strut added forward. So, with just day sailing in mind, I am free to do most anything to restore the boat.

So my first project was to build a forward bulkhead under the bow for structural reinforcement and flotation.
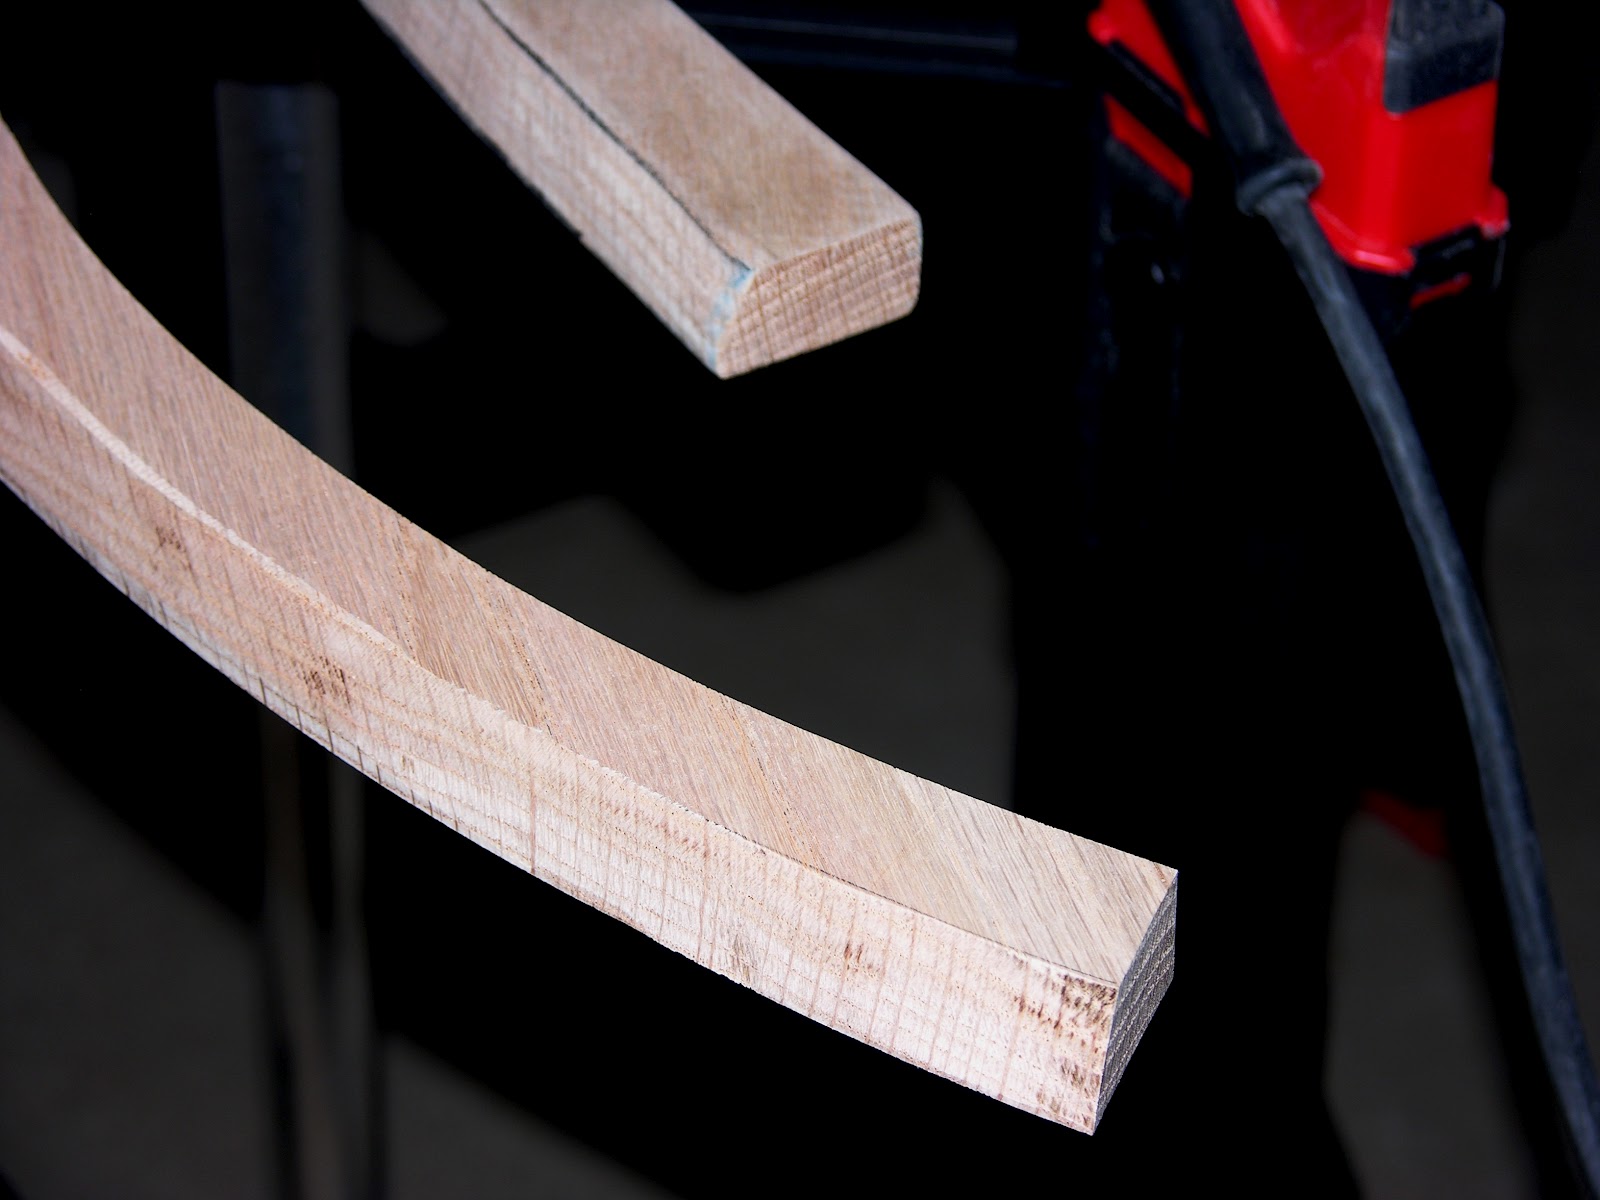
I cut opposing ribs from a 3/4"solid oak plank and the bulkhead from 3/8"oak plywood. I used West System resin to fix the ribs into the bow and fixed the plywood to the ribs with 6, 20 x 1" stainless steel wood screws. Then, to seal the front bow space as an air flotation space, I glassed in the aft edge with 4" strip of cloth. Both the ribs and the plywood bulkhead were treated with West System resin for water proofing.


Bulkhead is finished and I am now starting on the beam under the bow that supports the Mast tabernacle.
It has been removed and I will be replacing the supports on the sides. Will document and post next time.

Sunday, March 4, 2012

Lido 14

 Perusing Craigslist for small sailboats under a few hundred $$$, I found what looked like a sail able boat that I could maybe get on the water while I was doing a more extensive restoration of my Chrysler LS-16. I found the following at our local Goodwill.


        This boat had a Lake Havasu Yacht Club decal on the back and had been donated to Goodwill.

So, Friday after work, I went to check it out in Central Phoenix after stopping by the ATM to get some cash.
The boat looked pretty good for an old boat (listed as a 1970). so I gave up my $$$, signed off on the Trailer title and hauled it home (only a couple miles). When I got it home I started picking through the lines, shrouds, mast, boom, etc so I could see just what I had. Not too bad really, all the hardware was in good shape. Even the lines were usable, just needing a good wash. The sails were also in fair condition. Certainly the boat would get me on the water on our local Tempe Town Lake for the spring & summer while I put some real effort in my LS-16. 


So, I started looking on the internet for history and info about the Lido-14. What I found was very interesting and a bit baffling. First of all, sail numbers are originally matched with the boat hull number. The sail number is 2051 (vintage 1965). Now I can see an old boat with a new sail but a newer boat with an old sail didn't make much sense. And the logo & numbers are stitched as history says they should be for the #.


And the Hull ID # on the Arizona Game and Fish registration (and amateur engraving on a 1" x 3" plate bolted to the inside of the Port side transom) had numbers in it of the AZ registered decal either side of the bow. Looked fishy to me. So I started looking for the Hull #. With paint stripper, I looked from the top of the transom inside all the way to the rear of the Keel Trunk. I also looked for the embedded # on the outside of the Transom, Port & Starboard. I have found nothing as yet. The boat also has the traveler listed as on the "Classic Lido 14". 


Another curious feature was the forward bulkhead, obviously added after manufacture. It was secure but with screws and calking rather than with something like West System epoxy resin as I would have done it. I take it that there was no forward structure when the boat was built. The bulkhead was put there to aid with recovering from a capsize. Photos of later Lido 14s have a fiberglass manufactured bulkhead with a small compartment in it.


The Boat was painted dark Blue over the factory glass. So I don't know what the real year of manufacture is yet but I am intending to sand the area where I stripped the paint. I have to do that anyway now to prepare for new paint.

I will also replace the bulkhead with another better placed and better structurally. I will likely fill the bow area with expandable foam as well but now, although I have no intention of racing this boat, I want to make all additions acceptable with racing rules because whatever I do will be difficult to undo for a future owner that may want a "Classic Lido 14" to race. 

I do think I will get this boat in the water in a few weeks. It is in very acceptable condition for my skills of restoration. Anyone that can assist in identifying this boat for Hull # or probable year of manufacture would be greatly appreciated.

Finishing off the Aft Well

In an attempt to complete the Aft Well restoration (forward bulkhead, drain hole, etc.) I wanted to glass cloth over the entire well to seal it off once and for all. Upon closer inspection I found 2 stingers running from the bulkhead to the transom either side of the center of the well. These caused a small compartment to exist and no drain was provided so water (when washing out the well of dust, etc.) collected there. I had a choice of filling in the space or drilling a drain through the stringers. Even a drain hole would have taken a long time to be effective so I decided to fill in the space. 


I decided to use foam to fill the space and then to seal it off with glass cloth, effectively creating a floatation space. I am only talking about 1' x 1' x 3" tapering back to flush with the hull. I decided to use "Great Stuff" from Home Depot to fill in the space so as to support the glass cloth. The "Great Stuff" web site states that it is closed cell foam but I have read many Sailing blogs warning not to use it but rather to use proper expanding foam from a fiberglass supplier. Since I was going to seal it all off anyway, I thought "Great Stuff" would be much more convenient (to get and to use from the can). 


Since this is a blog of how I am doing this restoration, I cannot spare myself the embarrassment of error. I shop vacuumed the area, first sucking up all the debris and then blowing air to dry the area. Then I got my can and began spraying into the area. One can Starboard and one can Port. I am learning to be patient but apparently not patient enough on this chore as I didn't think it was expanding enough so I opened another can and applied half to Starboard and half to Port. When I came back the following day with my newly acquired electric serrated carving knife ($10 on Craigslist), the foam had overwhelmed the space. No Problem I thought, I would just trim it back flat as planed. First, the knife lasted about half way through the first trim before heating up and frying itself. So I had to continue with a hand held serrated kitchen bread knife. Then, because there was so much foam, the middle (the first can) had not cured and was a gooey mess, like bread that was not baked all the way through. I managed to get most of the top of the foam off the Starboard side and, running out of time, I just cut a gaping hole in the port side foam to expose the interior foam. I left that overnight and the next day the middle was also cured enough to trim. I didn't get a real clean job of it but as it will be all sealed with glass cloth anyway, it will be fine when I am done. 

                                                                         Starboard

Port


My final product should look something like the illustration below. I will then glass over the entire well. Don't know if I will paint or not. I am not concerned about that just yet as another boat has appeared in my yard and my attention has been directed toward that boat for the time being.