Saturday, August 11, 2012
Deck & Gunnels
With the help of some friends, the hull has been flipped back over right side up (see previous post video - "The Hull", June 10, 2012). Now I can finish off the deck, gunnels and the inside. So I am approaching the deck and gunnels first. There is not too much to do but there are some important aspects. You can see that the jib sheet rigging has been changed from the original set up. I am not sure just why but the rigging crosses over the through way next to the centerboard trunk and restricts movement in the boat. I intend to move the jib sheet cleats back to the gunnels. There are several positions that can achieve this. I am not sure just where the fairings and cleats will be positioned but first things first, I have to prepare the deck for painting and the gunnels for affixing the fairings, cleats and paint. The gunnels were also fixed to the transom with metal "L" brackets. I intend to support this join with glass cloth & resin, inside and out, eliminating any bolts & nuts in that area.
BTW: work is limited to early mornings (95 degrees F) now that the average temp is over 110 degrees F this time of year in Phoenix, AZ. In the very cold parts of the country, you may stay inside in the dead of winter. Here we do the same in the dead of summer! Dry heat doesn't help at 115 degrees!
Existing Jib Sheet rigging on the left, proposed (original) on the right.
Gunnel to Transom join:
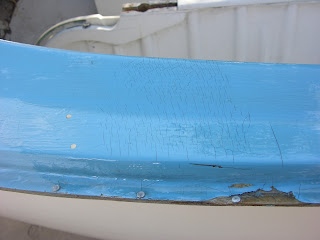
Labor Day weekend is here and I am determined to finish the deck and gunnels to the stage of being painted. Even from all I have read, I still do not have a clear understanding of Gel Coat. Assuming that it is just a layer of colored resin, I decided to "fix" the cracks in the top layer of the deck with the following steps. I gave the entire deck and gunnels a reasonable sand with 60 grit on my palm sander. Then I used West Marine Resin thickened with 403 filler, just to the point it would still brush on, to coat all the areas with spider cracks. When that set as a base, I brushed on another coat of resin but this time with no thickening agent. When that sets up I will sand with 60 grit followed by 220 grit. Then I will paint.................
Two coats on and one more to go...................


